 In 2008 I constructed a straw insulated dome with a diameter of 7 metres, meant as a comfortable place to read and study. Below a report of the building process.
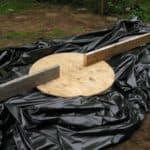
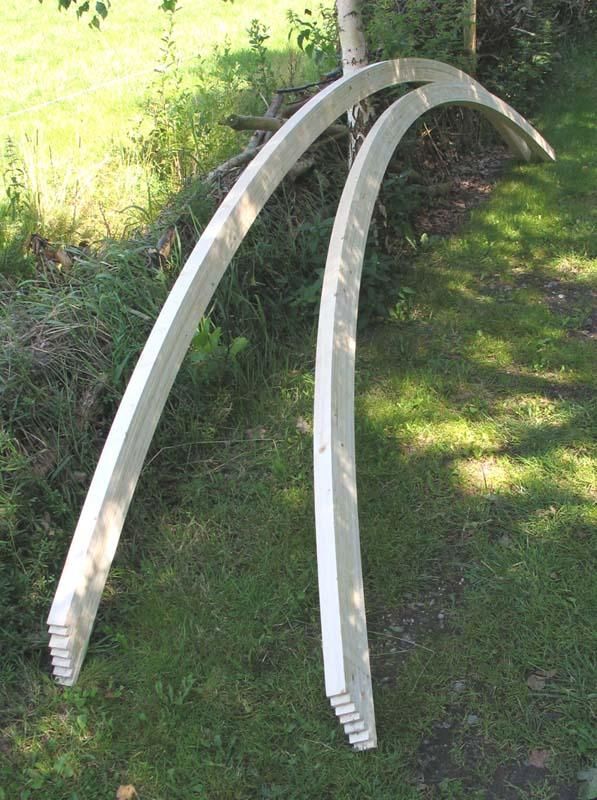
Before starting the actual construction, I made the segments which will form the main structure of the dome. I first needed a mould to be able to bend the laminated beams in. The basis of my mould is a beam of which I can be sure it will not bend under the stresses that may occur when pushing the segments in place. I took a beam of approximately 5 x 15 centimetres, just to be on the safe side. Attached to the beam are several smaller beams, radiating from the centre of the circle shape we are making. On top of them I attached the basis on which the segments will be pressed. As can be seen on the picture, an additional series of smaller planks radiate even more outwards, giving support to a second mould. This is because this particular mould was initially made for a radius of 250 cm. Later I increased the radius to 300 cm. So, the construction on the picture is unnecessary complex.
The circular shape of the mould is made from two layers of wood glued together, to approach the perfect circle shape as near as possible.
Note that the mould needs to connect at the end firmly. The bend shape wants to straighten itself and therefore you need to nail/glue/screw the ends firmly onto the sturdy beam below it.
Making the production of segments easy
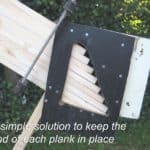
I made a simple construction to put the planks in. This way, it’s much easier to keep the strips of wood in place when bending them onto the mould. Make sure it’s possible to bend the planks easy. If there’s continuous risk of breaking you’ll have a stressful time when trying to press one against the mould!
-
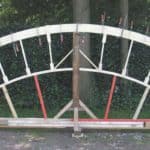
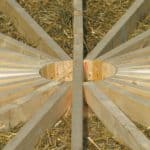
- The mould
-
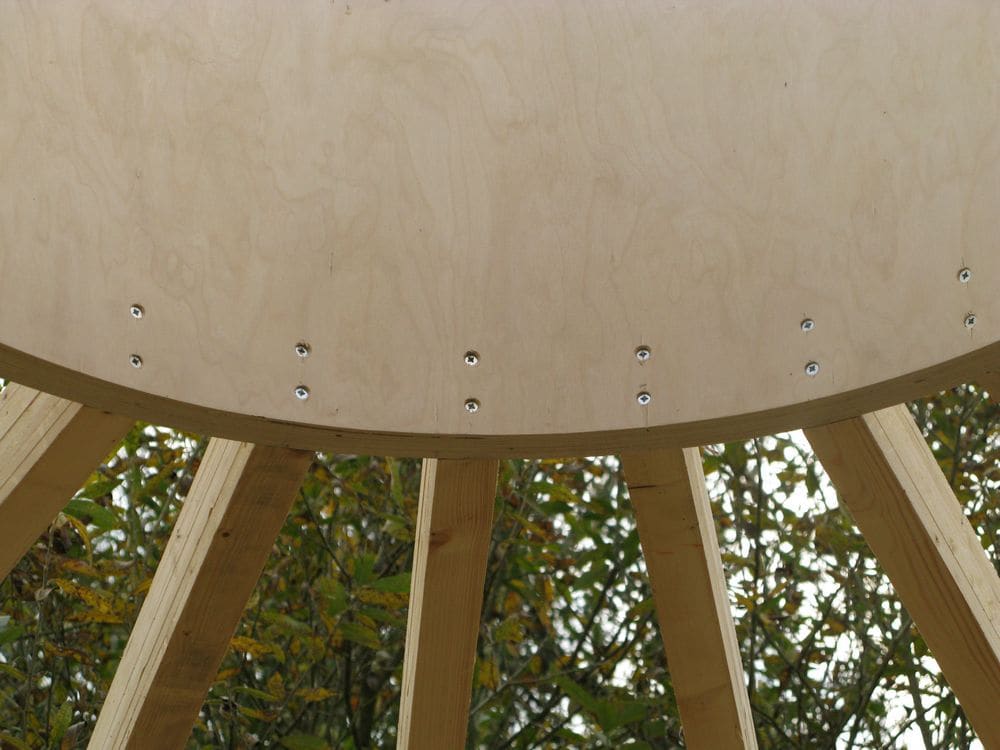
- Mould detail
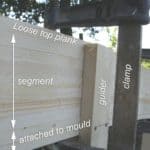
I have several guides attached to make sure the planks are put on top of each other as precise as possible. The only disadvantage is that glue can easily get between the guides and the segment. Therefore it’s important to apply not too much glue at places where the guides are.
I used Bison Professional waterproof wood glue, the white stuff. It comes in buckets of 5 litres. Maybe even bigger. The glue provides a very strong connection, so there’s no need to use polyurethane or something like that.
I was at first applying the glue with a paintbrush, but that took ages. Later I simply applied it with a glue-pot with a small nozzle, putting waving lines of glue on the surface of the plank. The trick is to apply exactly the right amount of glue. Too little can weaken your linking, too much results in spill and a lot of cleaning. As a test, apply the glue, press the next plank on top of it and take it off again. If there’s a good spread of the glue along the whole surface, then you’re doing great. If not, apply more. And if the glue is squirting out everywhere you may want to apply a bit more economical next time. Just test these things first. You’ll probably be glueing many hundreds of metres, so you can’t afford mistakes here.
I found that it’s hard to glue all layers (seven in my case) before the glue of the first layer started to dry. Therefore I did it in two stages. Four layers of wood with glue in between pressed together for two hours or so and then come back for the last three. According to Bison pressing for half an hour to one hour should be enough, but I decided to keep on the safe side and wait a bit longer. The air temperature also has a lot of influence on the time for the glue to dry. Needless to say that you have less time to press everything together when it’s hot.
Before I put the clamps into place, I added a loose plank on top of the glued segment. Any marks left by the clamps will be on the plank and not on your nice segments. The additional plank also makes the steady pressing of the layers below it easier.
The straw has arrived, but I don’t need it yet…
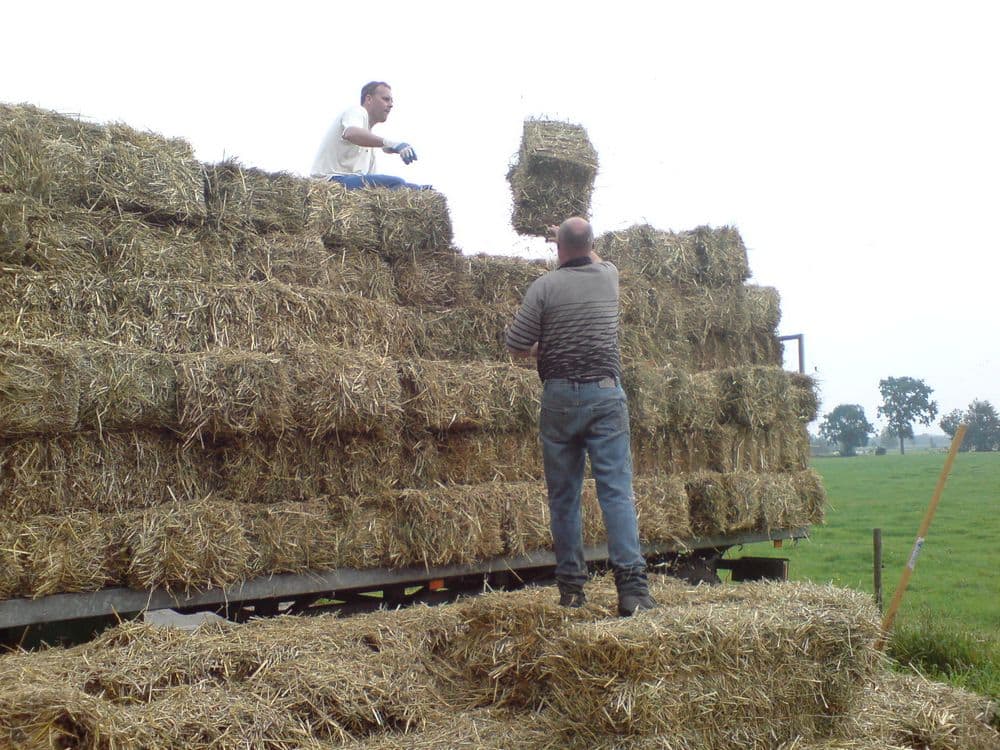
The straw bales arrived straight from an organic farmer mere kilometres away. 180 bales, coming from an area of three acres of wheat. Three acres, pressed into 180 bales. 180 bales, forming a dome with a floor area of roughly 30 square metres. And since straw is usually nothing more than a waste product, often burned on the spot, it would be fantastic if al those acres of straw would be transferred into straw bale homes. Nice method to store large amounts of carbon dioxide, too.
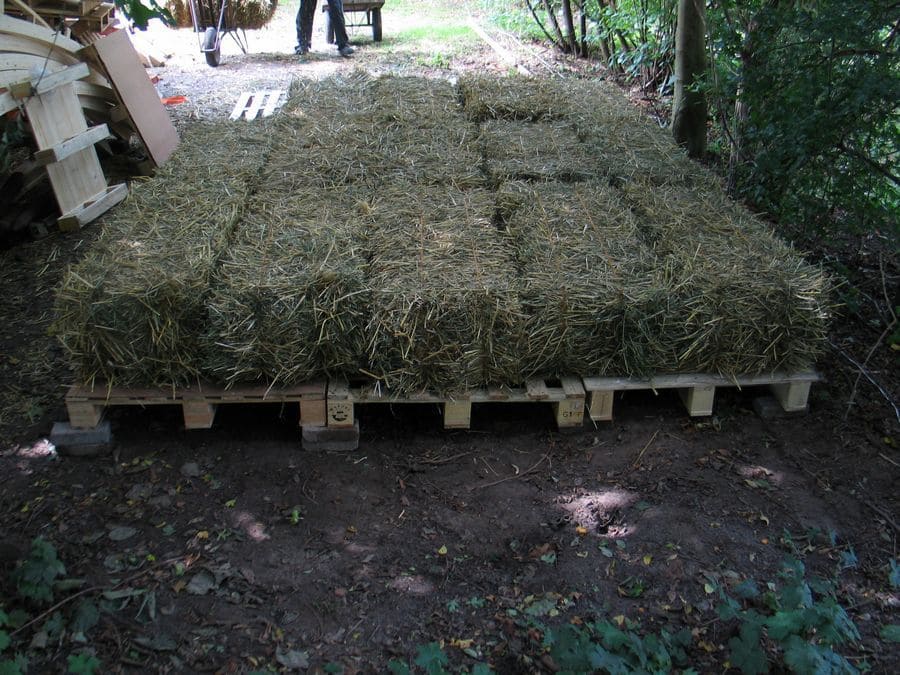
Anyway, the straw for the dome arrived in the last week of August, shortly after it was harvested. The trouble is that I will not need it for some time and therefore it needs to be stored in a ventilated and dry place. In this case: simply under some tarps. I started with a layer of pallets on which the bales were placed. After making a stable pile of bales I pulled the tarp over it and secured it with some ropes.
The straw bales I got were bone dry, but even then there will always be some moist in them. At warm days the water may evaporate from the bales and condensate under the tarp. Best to check this now and then and if condensation indeed does appear, just take off the tarp on sunny and warm days.
-
- Organic straw
-
- Off the ground

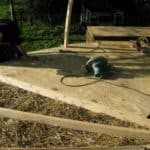
Construction of the floor
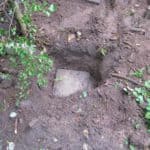
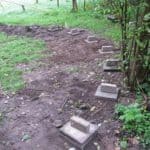
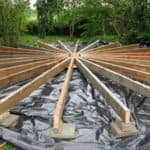
The foundation consists of 24 columns of stacked paving stones, placed in holes each 60 centimetres deep. I also made an extra big central column on which all 24 beams will meet each other. Then I covered the whole circle with a tarp, with something like 50 cm extra all the way round. The tarp prevents moisture evaporating from the soil, which could possibly make the wood rot. It’s wise to let the tarp slope a bit from the centre to the circumference. If water would drip for whatever reason on the tarp it will not form pools. Even with the tarp in place small amounts of water vapour may accumulate under the floor. Therefore make sure the space under the floor is ventilated.
After placing the tarp I simply continued on the columns underneath with one more tile and whatever I needed to get each beam level. Basically this means adding bricks and pieces of multiplex under each beam until it’s level. Make sure these loose pieces will be fixated at some point, since they may shift due to small vibrations. As can be seen on the pictures I put a big circular piece of multiplex on top of the bricks in the centre. That way I have a good support for the beams. Also, I could put some orientation lines on the multiplex.
 Placing the first layer of underlayment
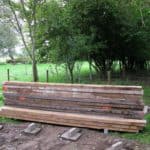
Now that all 24 beams are level, the whole area is covered with underlayment. Like the beams, the underlayment is reclaimed material, reuse of building materials is another method of saving the environment.
The floor boards do not follow the beams, because I tried to work as economically as possible. Where the underlayment wasn’t properly supported, I connected them with strips of leftover underlayment.
I have tightened everything with screws, to get the strongest possible floor. Since the boards are reused, there can be the occasional cracks and openings. Therefore I put pieces of board wherever needed to block any passage for rodents and insects to my precious straw. Here in the Netherlands that should be sufficient. However, in other countries it may be necessary to take additional measures to block out more aggressive insects. By the way, if you have termites they will not be interested in the straw. Only in your wood…
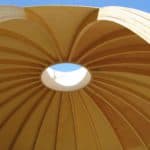
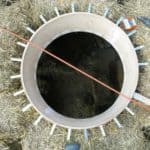
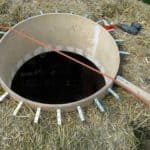
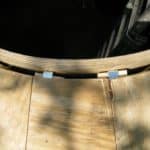
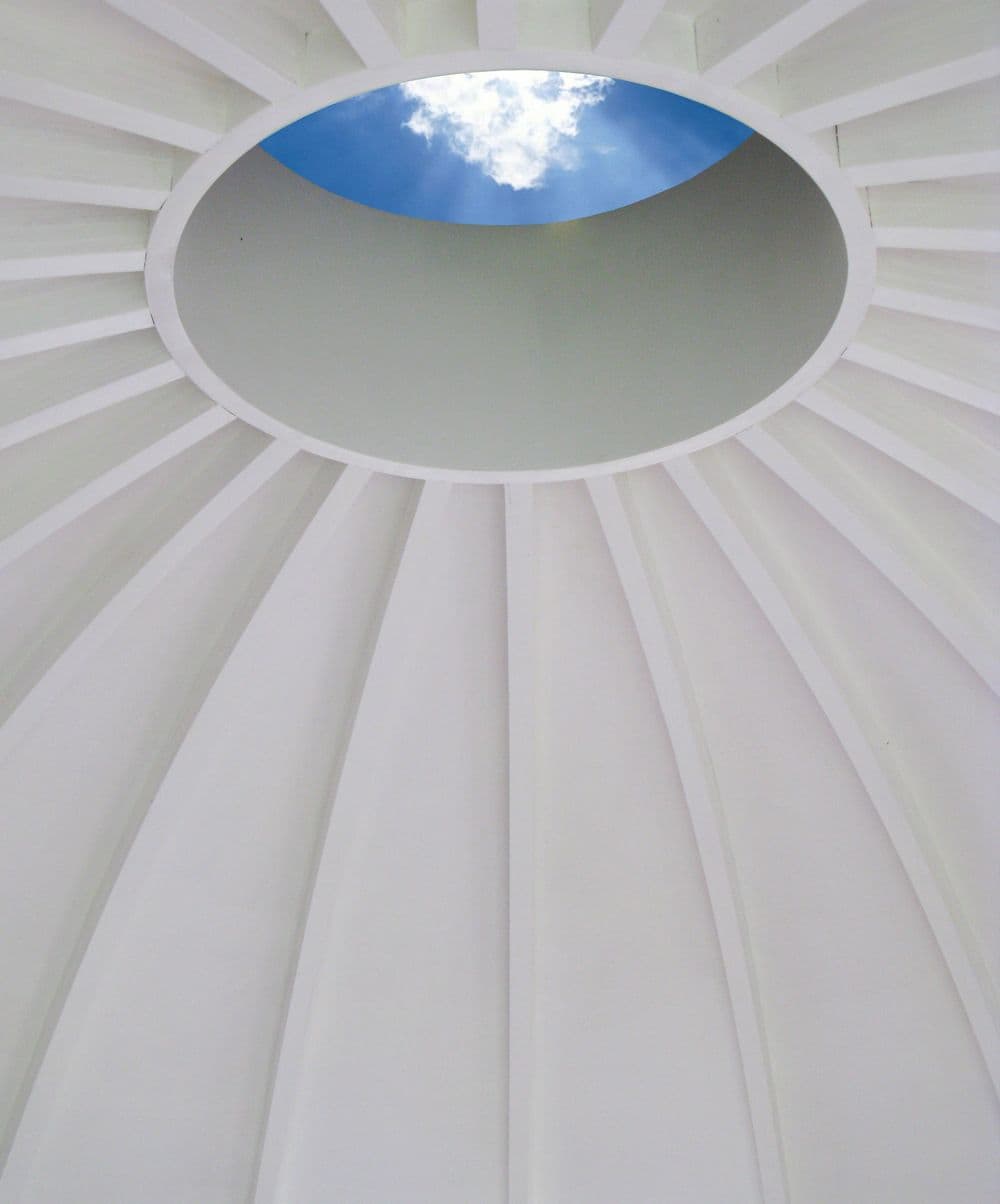
Intermezzo: the central opening
At the central opening in the top of the dome all 24 of the segments will be attached. Also, on top of it, a dome shaped window will be mounted. Since the segments will exercise quite some inward force to the ring, I made sure that it’s completely rigid. Where the segments meet the ring, I also made it thicker by means of twelve layers of 3 mm multiplex. The rest of the ring is only six layers. The height of the ring is roughly the height of a segment plus the height of a straw bale.
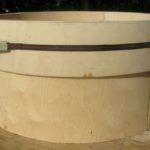
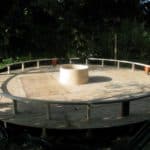
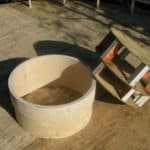
Laminating the ring is not hard. It’s best to make a mould that’s basically a big cylinder on which every layer can be bend. I did it one layer at a time, because the drying of the glue limits the available time. I pressed the layers together with straps. It’s convenient to have a couple of extra hands available for this.
 Creating an elevated floor
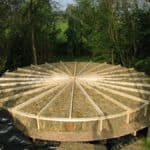
The floor which we have now is only there to support the layer of straw bales which will be placed shortly. Next step is to put 24 short pieces of timber in a row on which a big ring is placed and screwed.
The exact place of the ring was simply established by drawing two big circles on the existing floor. Between these circles the ring will be placed, only elevated some 30 cm (to straw bale height). After drawing the circles I attached 24 L-shaped galvanised profiles on the existing floor, to the inside of the circle. The segments I prepared earlier where screwed temporarily against these L-shapes, together with one more strip of wood to both the inside and outside of the prepared segments. The segments were all 5 layers, instead of the normal 7. By adding the two more layers I created a rigid ring. I screwed, nailed and glued these additional strips in place. Now the circumsphere of the ring was secured, the whole ring was released again from the L-shaped profiles to make space for the 24 short pieces of timber which will support the ring from now on.
Re-tying straw bales – the bale needle
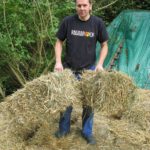
Straw bales are held together with two or three strings. Without these strings, the straw bales will fall apart completely. When you need to resize a straw bale, you need to re-tie the bale.
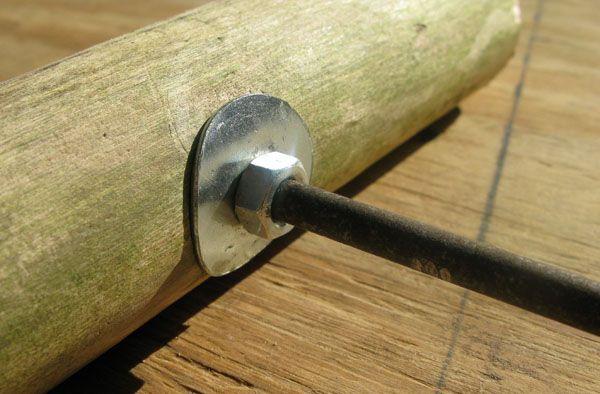
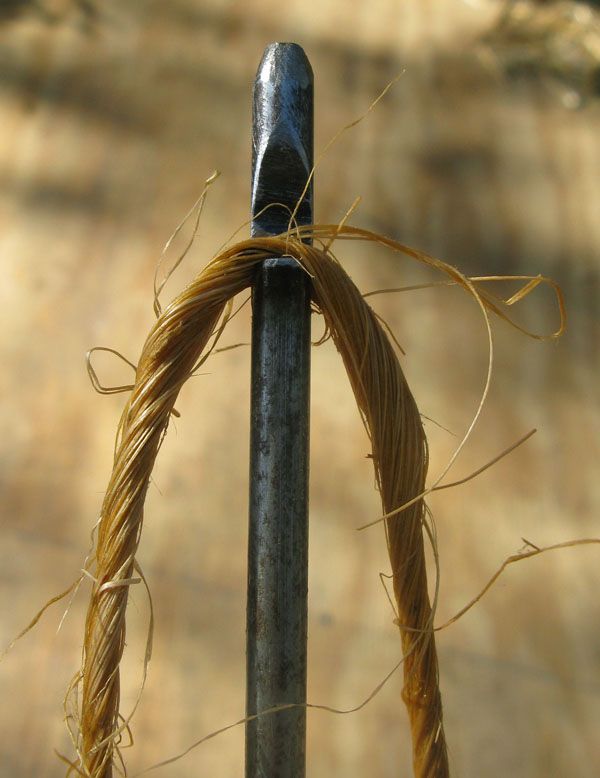
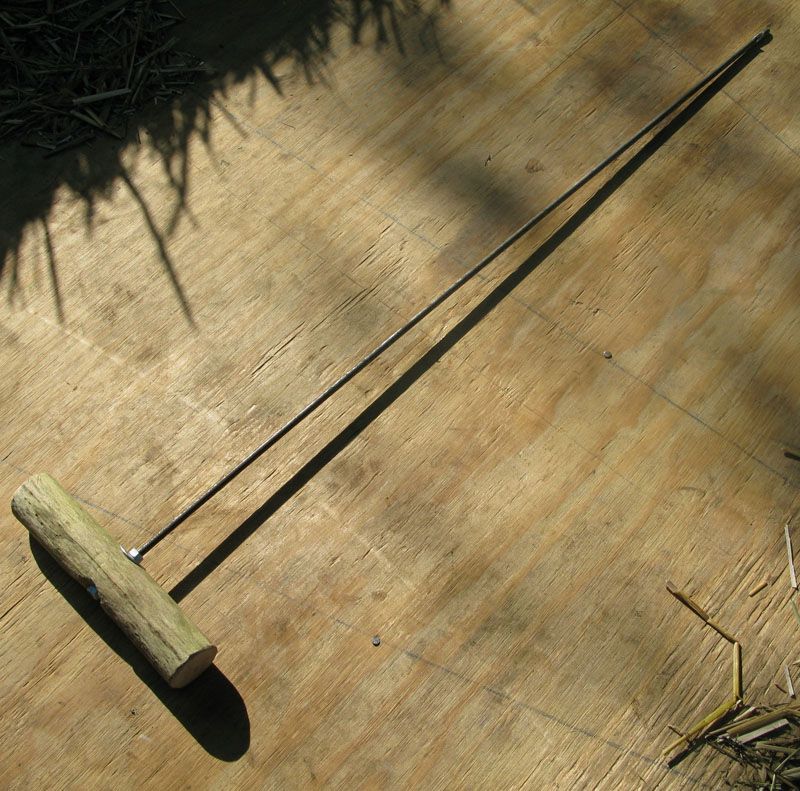
Before we go into reshaping bales, let’s first have a look at the bale needle. It’s a simple, but also essential tool to push a new rope through a bale. I made one myself, but they’re also for sale on the internet. Just enter straw bale needle in Google and you’ll certainly get what you want. Probably on Strawbale.com. Great site by the way, spent hours on it.
The needle I made has a grip from a piece of roundwood I found in the bushes. I simply drilled a six millimetre hole in it, after which a steel pin was put through. On the first centimetres I cut a thread, so I was able to screw a nut plus ring on each side of my grip.
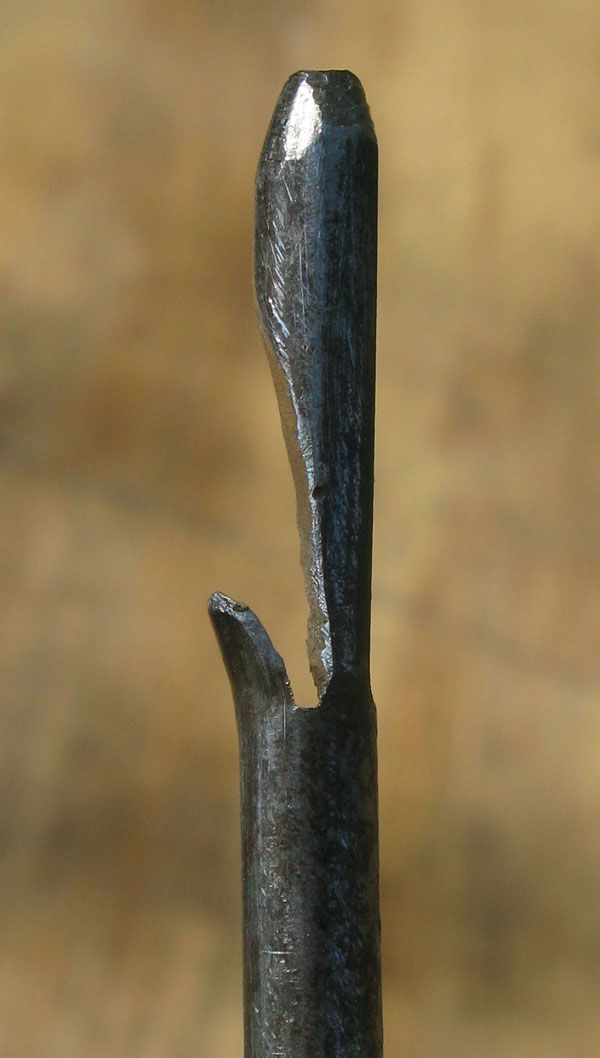
The tip of the pin was rounded a bit, to make it easier to get through the bales. No need to make it really sharp, it only makes it more dangerous. A small notch was cut under an upward angle in the pin. By clasping the tie around it, it’s easy to push the rope through the bale.
It is also possible to make a second notch on the other side of the pin, enabling you to push two strings at once. This way you can retie a bale in two directions at the same time. Finally, you can also make a downward notch. Then you can also pull a string through after you’ve pushed the needle (without rope) through a bale.
Re-tying straw bales – how to do it
Creating different shapes and sizes in straw bales
After pulling a new string through a bale, you need to knot it together again. There’s the so called Miller knot which is recommended by Strawbale.com. It’s definitely worth while learning this knot, because it enables you to pull the string really tight around the bale.
In the video there’s info on how to retie straw bales. It’s made by Andrew Morrison from Strawbale.com.
Re-tying straw bales – The Miller knot
Tighter strings than a mechanic baler can produce!
One more video, again from Andrew Morrison. It shows how to make the Miller knot, which is really convenient when you want to retie a straw bale.
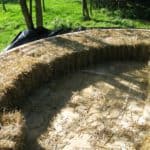
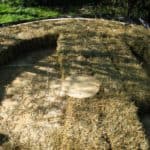
Covering the floor with bales
With the straw bale re-tying technique it’s now possible to resize each bale and also making angles in them. I’ve covered the floor with two full circles of bales, starting from the outside ring. After this, I started to make straight lines of bales, reshaping each bale at the ends of each line. Don’t be tempted not to work meticulously. You may think that the cavities that remain can easily be filled with loose straw. But the bigger the hole, the harder it is to keep the straw in there after you’ve stuffed it there. Keeping it compact will be hard. Therefore, invest time in reshaping your bales and try to avoid cavities as much as possible.
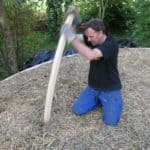
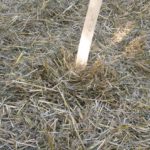
Stuffing the holes with loose straw
When the last of the bales was put in, the work wasn’t finished yet: everywhere small and somewhat bigger holes are left which need to be filled too. If you don’t, the insulation will be less effective, sounds may enter the dome easier and the fire resistance of the straw is diminished. Strongly compacted straw doesn’t burn very fast. So, fill each hole with straw and compact it by thumping on it with a piece of wood or something. You’ll be surprised how much straw vanishes in the cavities! Don’t stop until no more straw can be stuffed in. The stuffing of the floor is a good exercise for the filling of the bales which will form the dome later.
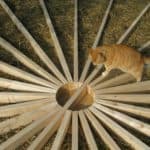
The second layer of beams
The second layer of beams is more or less the same procedure as the first one. After screwing all of them in place, I made an extra support halfway each beam by driving a small piece of wood in the straw, all the way to the floor beneath. Then I worked it under the new beams, providing an extra point of support. This is not really the easiest way. It would have been better if I had made the supports when the floor was still free of straw. As can been seen on the pictures, I let one beam run through the middle, so I can make a well attached centre point later.
The floor segments
I decided to make triangle shaped segments to cover the floor with. We have a standard of 122 x 244 cm for all kinds of boards here in the Netherlands. The underlayment I use has these dimensions too. I can get two segments out of one board with not too much waste material. When you make the segments, the only thing that’s important is the 15 degrees angle. The width of each segment has only to be measured approximately. By pushing each segment inwards or outwards the circle, you’ll be able to centre each of them accurately on the beams. The excess material of the outside and inside of each board can be removed later.
-

- Two triangles from one board of underlayment
-
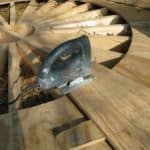
- Lift the board slightly to give the blade space
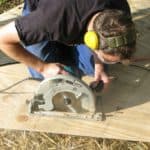
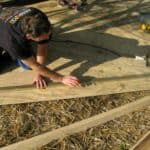
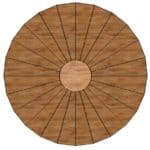
I have nailed all the boards, but also applied dozens of screws, to make sure everything stays in place. I first secured all of the boards at the outside of the circle, then outlined the inner and outer circle, using a pencil and big wooden compasses and cut it all clean using an electric saw. I pulled up the centre pieces one by one, supported them with a piece of wood and cut them one by one. When the central ring was cut clean, I screwed all of the boards tight.
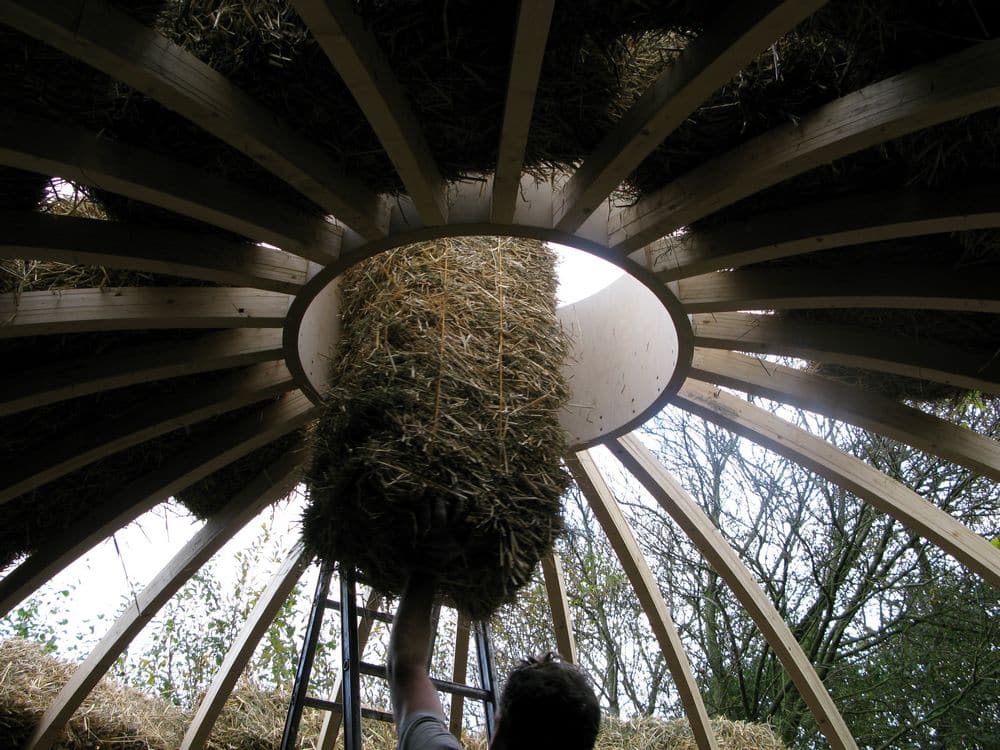
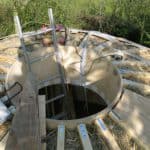
The central opening
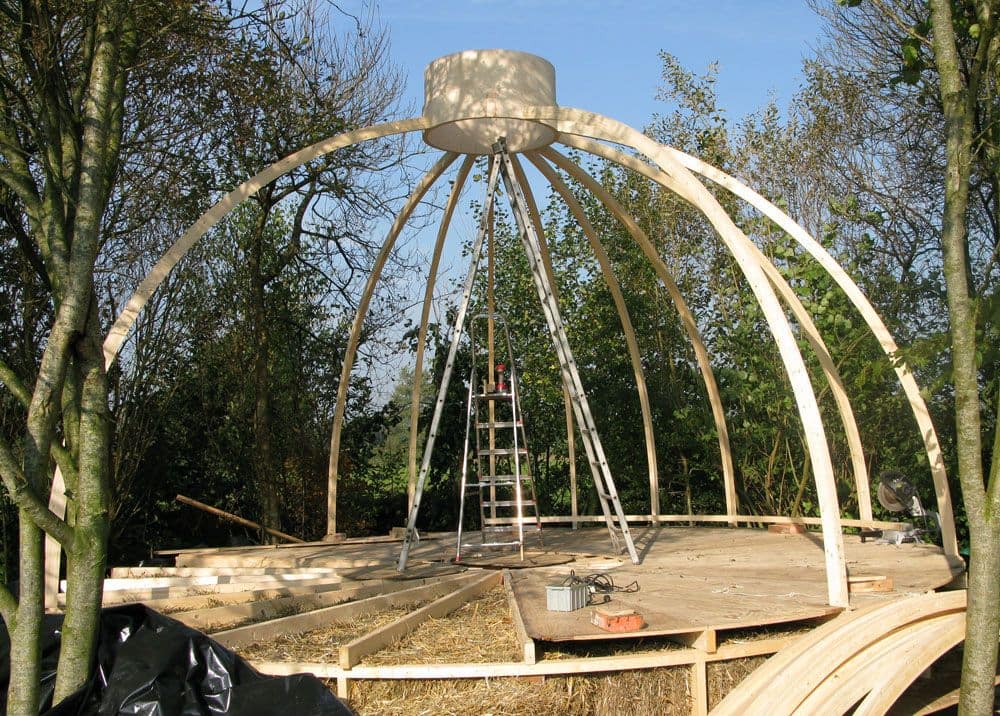
I first drilled holes in the central opening, so it’ll be easier to attach the segments later. Then I attached two beams to the ring to give it a pair of legs. To keep the legs in the correct angle I attached some timber to create rigid triangles. Then I called in some people to erect the whole contraption and support it further with more triangles.
The central ring is now approximately at the right height. It’s not completely level, but no worries: with the attachment of each segment it will correct itself more and more.
Check and double check if the top ring is safely secured. There’s a big weight floating around at several metres from the surface. This is a potentially dangerous situation! Also, take possible wind-loads in account. The dome’s vulnerability for wind will decrease swiftly with the attachment of each new segment.
Clean cutting the segments
Both ends of each segment needs to be clean cut under a specific angle. I simply laid a segment at the circumsphere of the floor, which has the same radius. Then I put the dimensions of the top ring on the floor too with a marker. Were segment and top ring met I marked the segment to get the correct angle. The angle of bottom side of each segment is determined by the line which goes through the centre of the floor.
When each angle was determined, I fixated my saw machine to the floor and fixated the segment in the correct position too. I marked the correct position with a couple of nails. After cutting the segment, it was easy to put the next one exactly into position. This way every segment got exactly the same length.
Before cleancutting all of the segments, it’s best to check if you got it right by first attaching a couple of segments to the top ring. The segment should join up to the floor and the top ring.


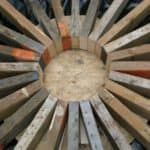
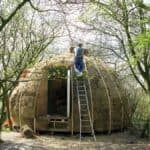
Getting the first segments in place
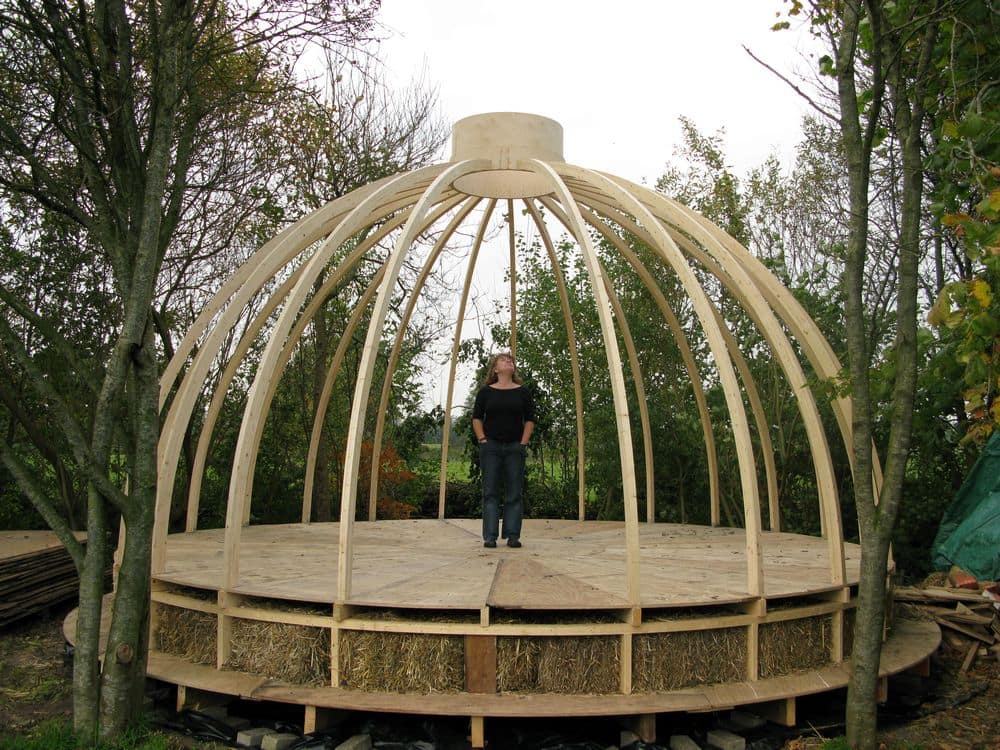
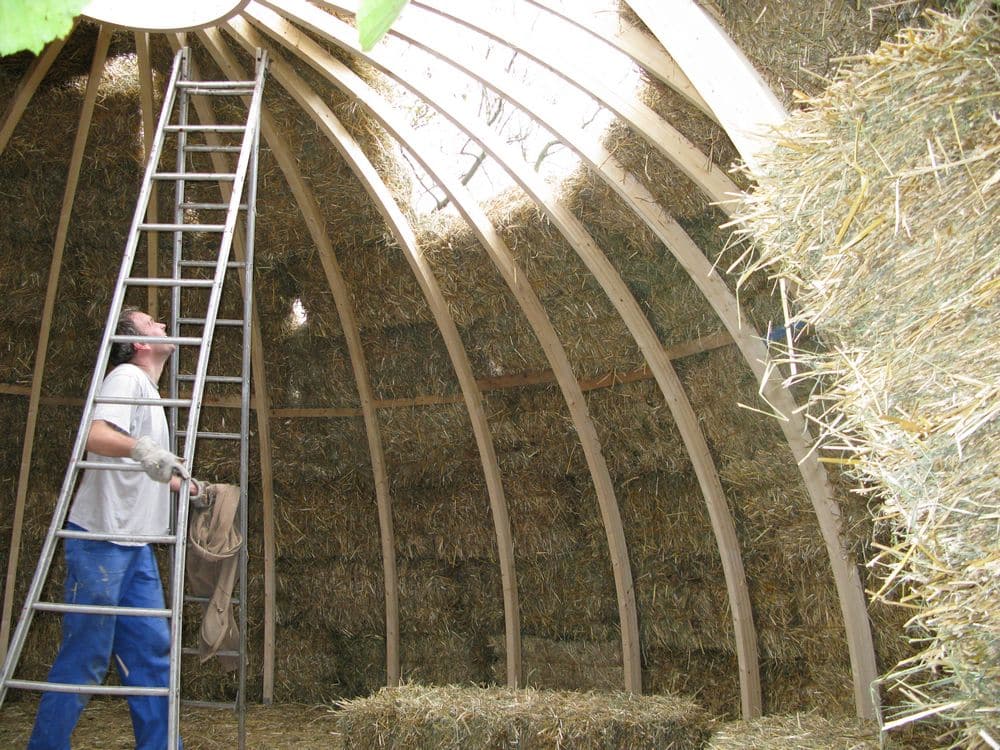
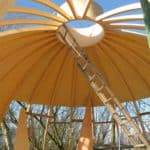
The dome is taking shape! The top ring is more or less into the correct position and then it was a matter of attaching the first segment.
I first fixated the segment on the floor, which is the easy part. After this, it’s up the ladder and trying to get the segment into the correct position. Especially the first one may be hard. In my case, the top ring wasn’t exactly level and also a bit too low. I had better made a more accurate support, so the top ring wouldn’t need to be adjusted at all. This is also safer. Speaking of safety: please make sure you have a good ladder, a safe position to work from and a well fixated top ring. It may even be better not to use a ladder at all, but to use scaffolding.
Each time a new segment is attached the ring will get more and more level.
After attaching 23 segments the frame is ready and I’m fully contented with it so far! When applying force on an individual segment from or towards the centre of the dome everything is very rigid. Of course it is still possible to flex the segments sideways, but this will disappear when the dome is covered with the next layer. The segments are fastened against the top ring with two 80 mm screws. At the floor they’re simply attached with L-shaped hardware. All forces are rectangular on the surfaces the segments have their support on, so each segment tends to keep into place, even without any fastening.
Indeed, the 24th segment is missing in the pictures, but that’s because I need an extra wide opening to give the door sufficient width. Part of the segment will be put in later.
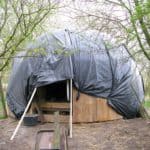
Temporary storage of the bales
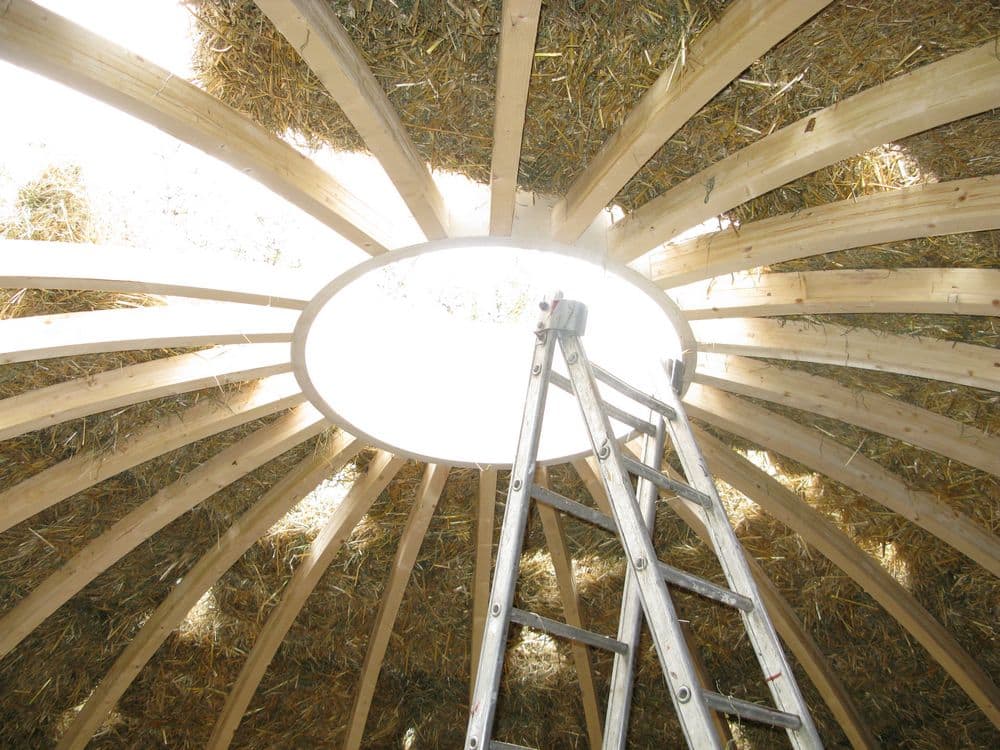
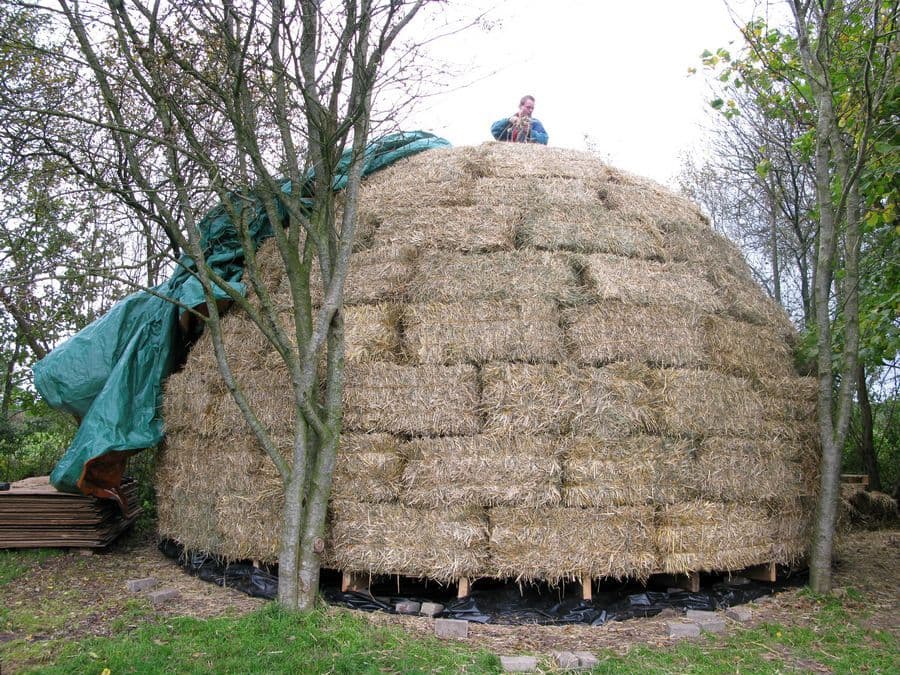
Because of other obligations, work on the dome stopped for a couple of weeks. With winter approaching, I thought it was wise to store the bales a bit more protected against the elements. I decided to stack them on the dome, also because it’s a good way to find out if any problems can be expected when the bales will be placed permanently.
I must say that the stacking didn’t give much trouble, the crude laying was done in mere hours. When the bales need to join up later, it will be necessary to reshape the bales on the top of the dome in a more or less skew form. I found that the bales in the first four layers did join properly.
During the stacking of the bales, I didn’t give any further attention to a precise pattern. It would only take a lot of time and all the bales will be taken off again anyway. The whole dome is now covered under a big tarp, which is secured to the ground to make it windproof.
Putting boards on the segments
Later all bales were removed again and a layer of triangular shaped boards was screwed on the segments.
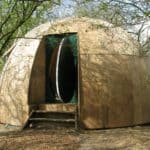
 The egg-shaped entrance
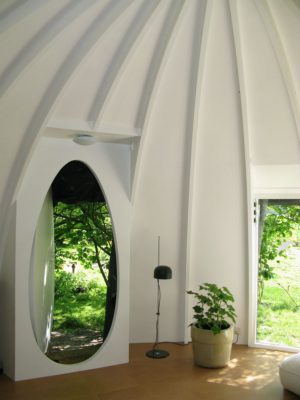
A rectangular door in a structure which has only round shapes wasn’t my first choice. Therefore I decided to make a rounded door instead. A circular door is an option, but if you don’t want to bend over every time you want to go through, you need to make a door that’s at least two metres high. In the case of a circular door this means that the width is the same as the height. So, unless you want to make a small hobbitlike door for your house, a round door isn’t the best choice. Oval is better, because then you can choose the best width. I eventually made an egg-shaped door, which is even more organic in appearance.
The door is made of two 244 x 122 cm and 18 mm thick panels underlayment, which I had available. Well, the first mistake was made I’m afraid… This stuff is just too heavy to handle, especially since I used two of these monsters to make my door. In fact I made a sandwichlike construction, two panels, separated by boards. But before bringing the components together, I first cut the oval shapes from both the panels.
You can construct the egg shape with a piece of string and three nails in a triangle. More about egg shapes. The string needs to be completely free of elasticity, which may be hard to find… Maybe a flexible but rigid piece of steel thread will do the trick?
When you have drawn the desired egg shape on your wood it’s a matter of very precise cutting. Probably best with a electric saw. The trouble I had, is that the saw tends to skew while cutting. Next time, I’ll use a thinner kind of panels of softer wood I think.
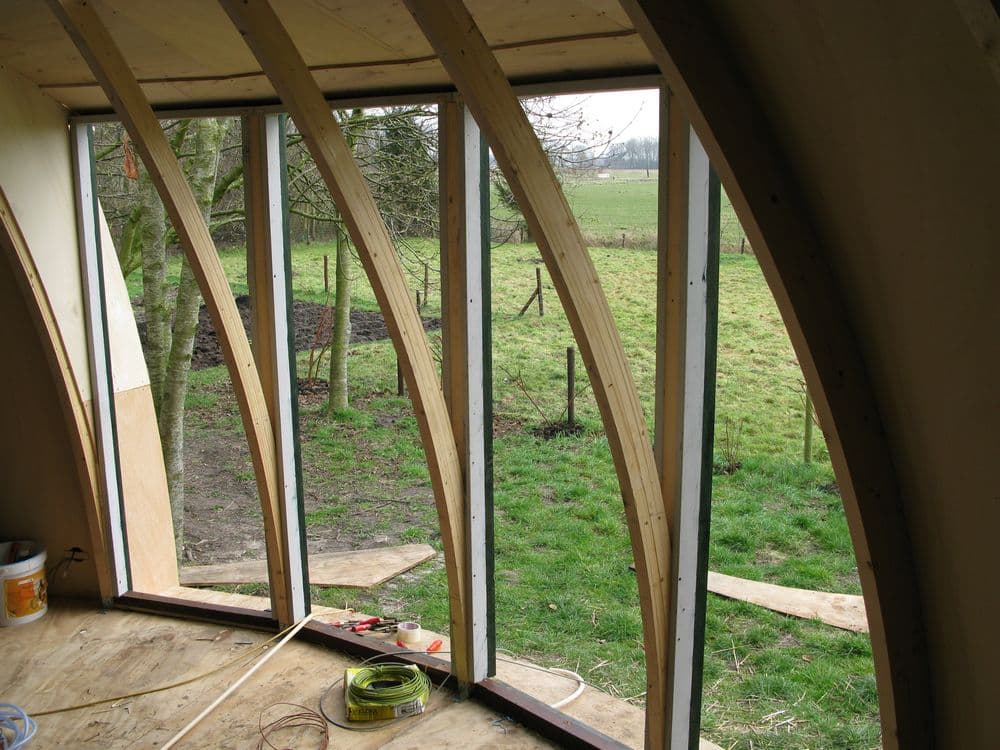
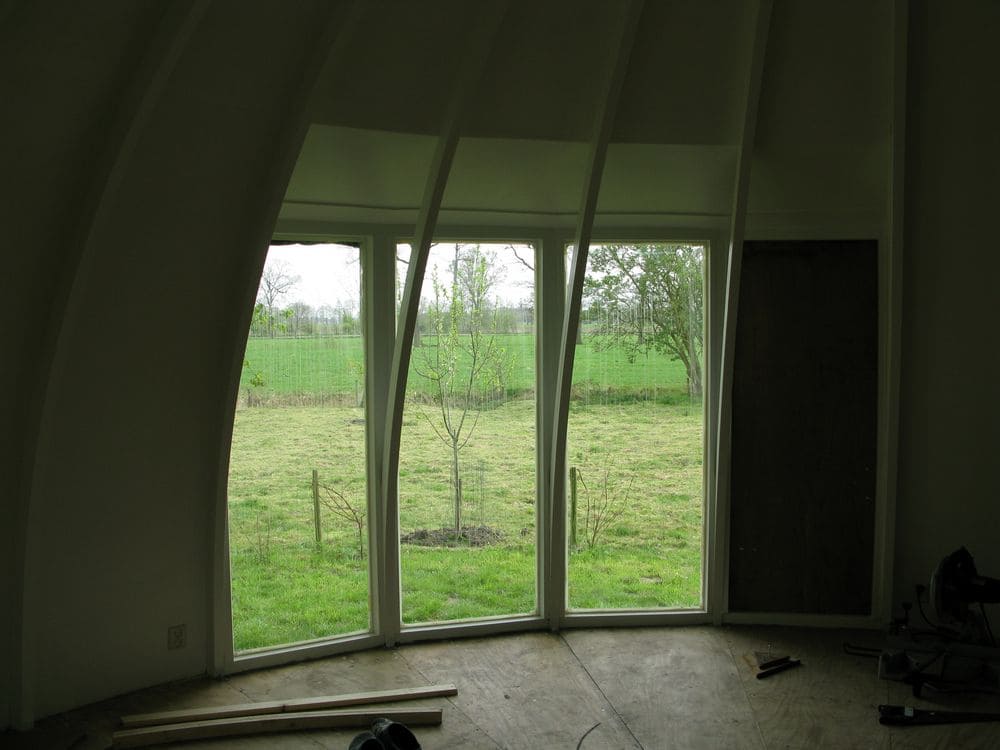
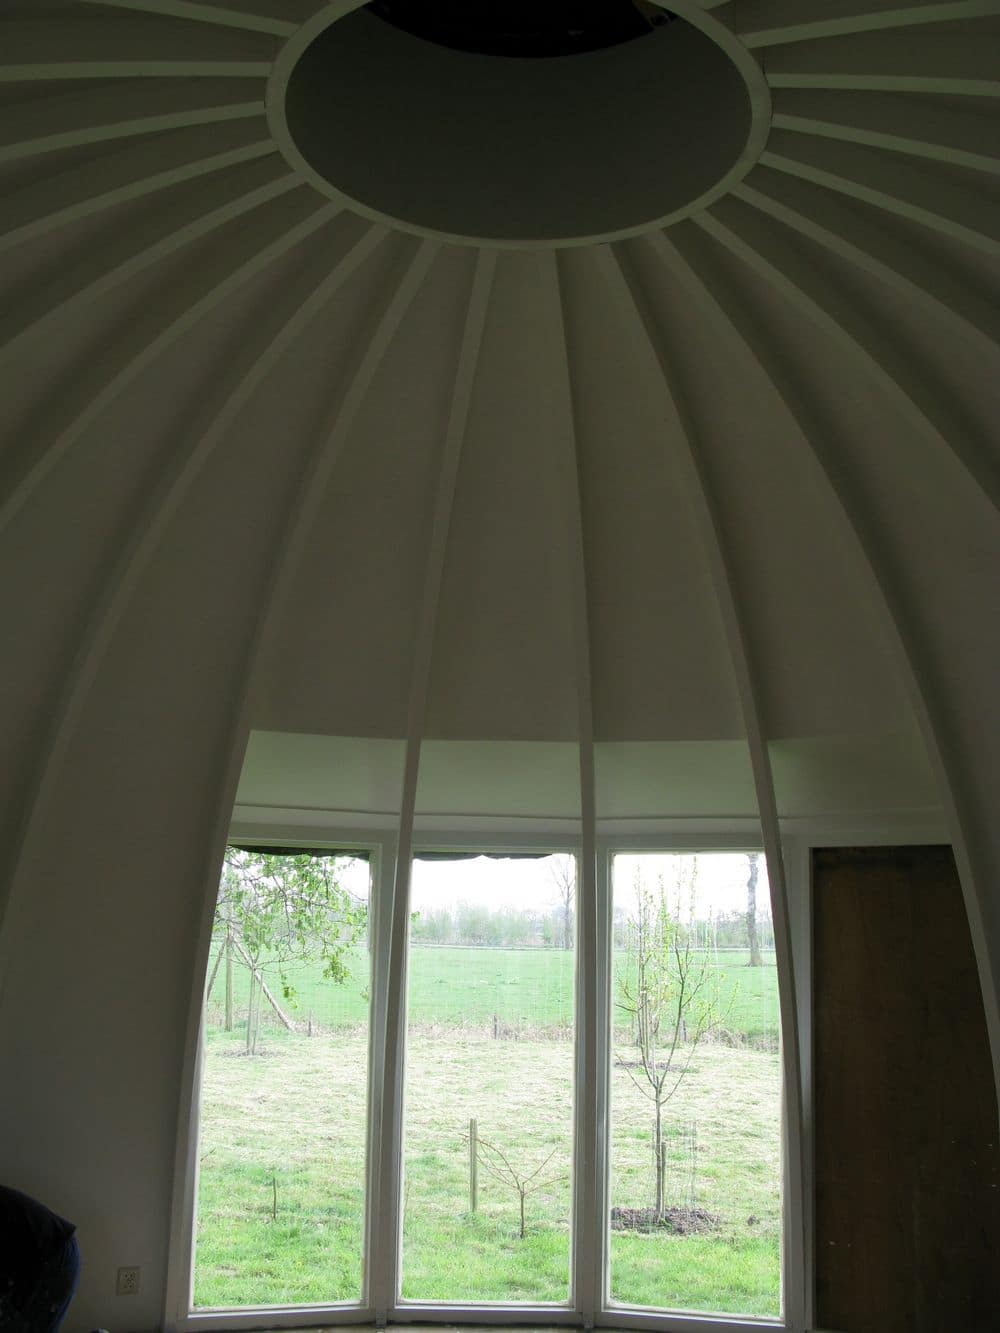
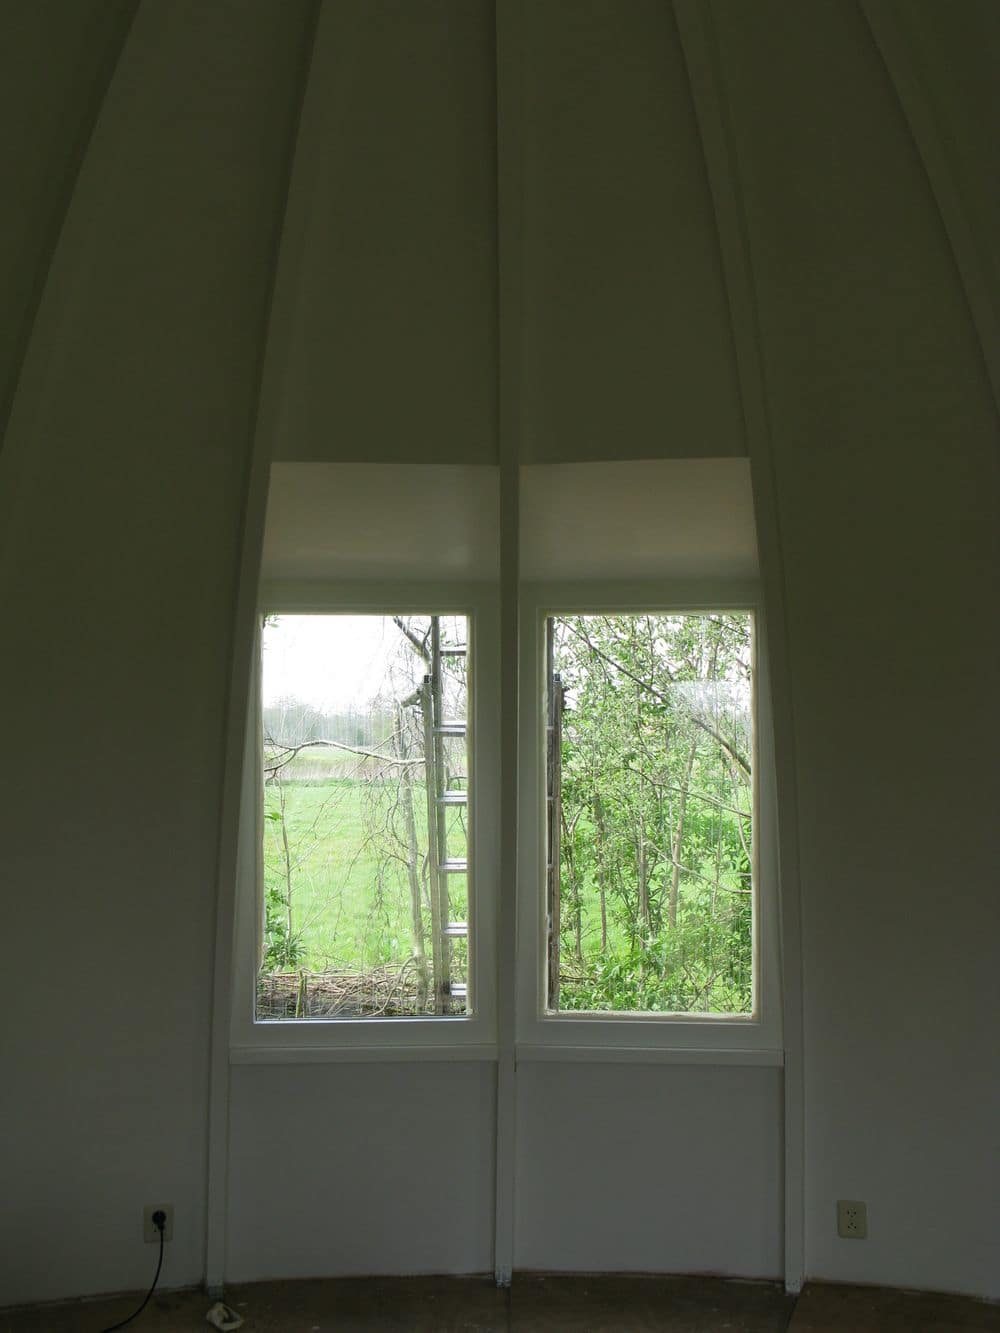
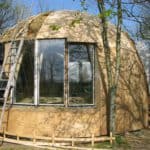
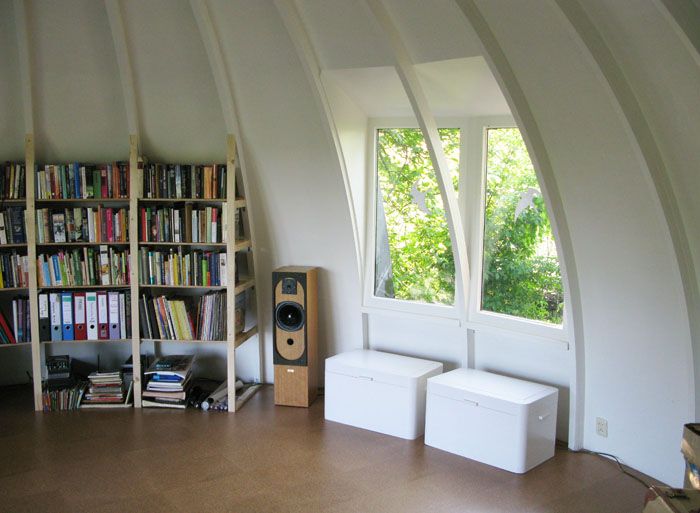
The windows
The large rectangular windows combine nicely with the otherwise curved shapes of the dome. They where constructed on the spot and fitted with double glazing. The picture shows the situation later in the development of the dome. The opposite side of the dome (the north face) got a set of smaller windows.
Placing the bales permanently
The first few rows of bales were easy. Just putting them in place and sometimes I had to retie one to get the right length.
After a few rows the bales tended to bulge out, which was a pity, because ideally I would cover the whole dome first and then start the next phase.
I decided to attach the boards which will later be the basis for the final skin of the dome. These boards would keep the bales in place. Make sure you have boards to cover the full length all the way from the base of the dome to the top. Also make sure the boards can handle the bend you need to make. Especially knobs are the places were boards will easily break. My boards weren’t long enough, tended to break all the time and were infested with knobs…
Later I will stretch each board, so the bales will be pulled against the dome and a smooth shape should be the result.
The outer shell
Next, the whole dome is covered with a shell of 12 mm underlayment. It’s basically a matter of making a more or less smooth surface for the waterproof membrane that’s coming next. It’s proved to be a hard stage in the building process: the boards that were curved along the straw were a far from optimal base to screw the underlayment panels on. I should have made thicker segments, which were more self supporting. Anyway, in the end the shell was there and the dome was ready for the final layer: protection against the elements!

 Ready to cover with EPDM
Now the whole outer skin is in place, it’s time to put the EPDM rubber on. It is possible to do this yourself, but I made the choice to let professionals handle this stage.
The EPDM is attached in large pieces, which will result in folds and patches. But since the dome will be covered completely with vegetation, this will be no problem. The alternative is to make triangular segments again, this time from EPDM and create a smooth sphere. This is a good option when you do not apply vegetation. However, the method of segmenting the EPDM not only is more labour intensive, but also means a lot more seams. These need to be accurately sealed to prevent any water creeping in.
According to the EPDM specialists who will be covering the dome, EPDM has very good breathing capability. Moisture should be able to easily pass through the EPDM, while rain is effectively kept outside. Just to be sure, I made a small ventilation grid on top of the dome later.
 We have immediately put lots of ivy and other fast growing stuff around the dome. Also, the dome is covered with a net, to give the plants an even better grip while finding their way upward. Hopefully everything will start to grow rapidly, covering the less attractive outside parts of the dome. By the way: the net in front of the windows was cut away later.
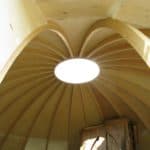
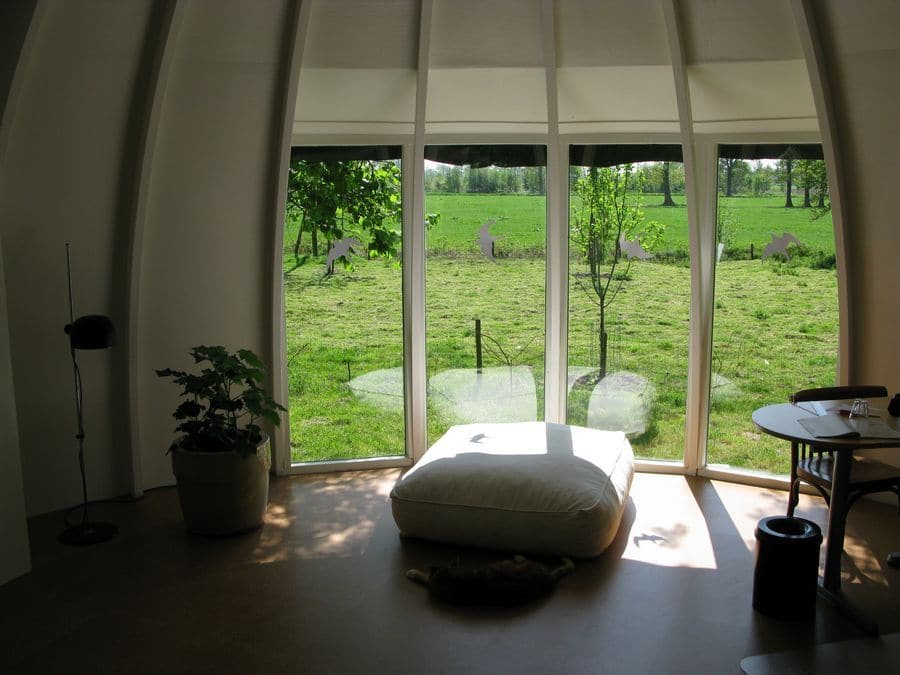
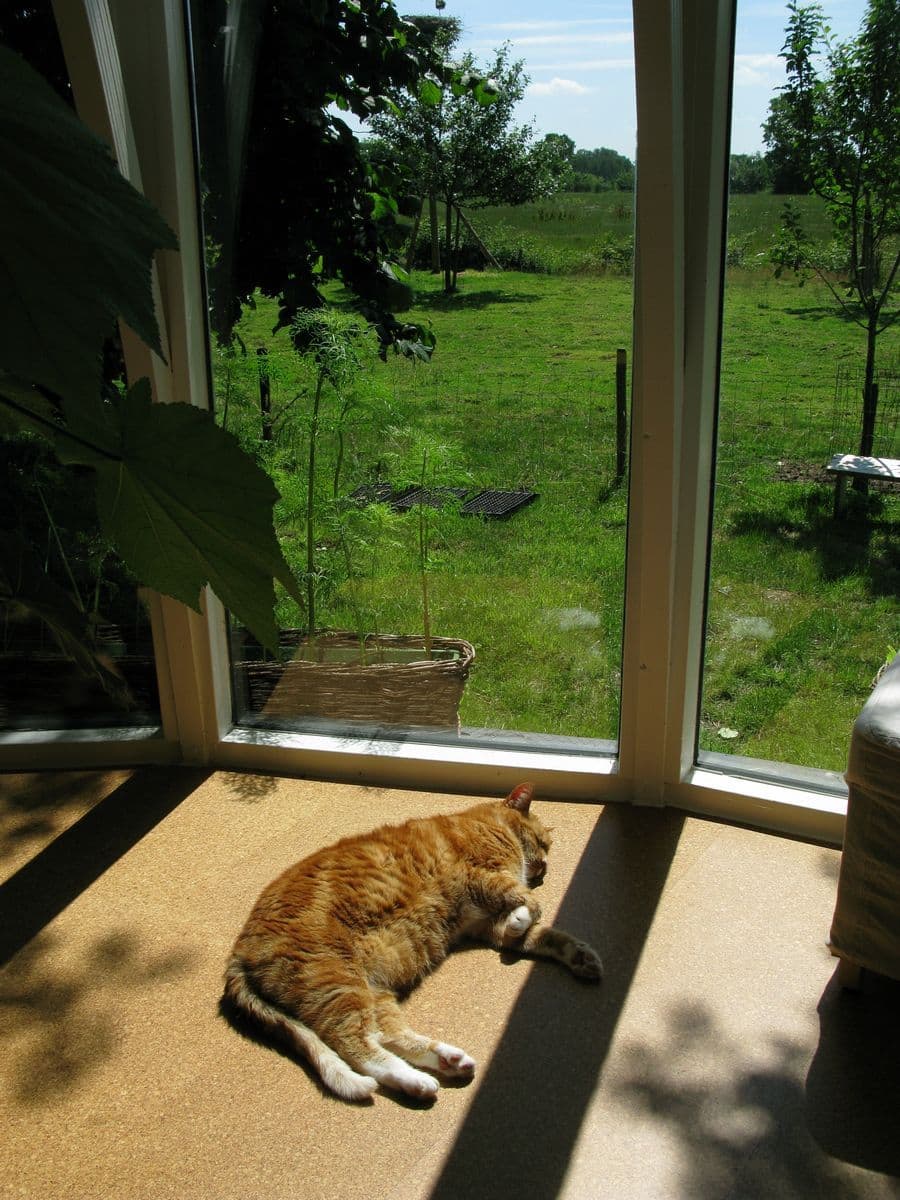
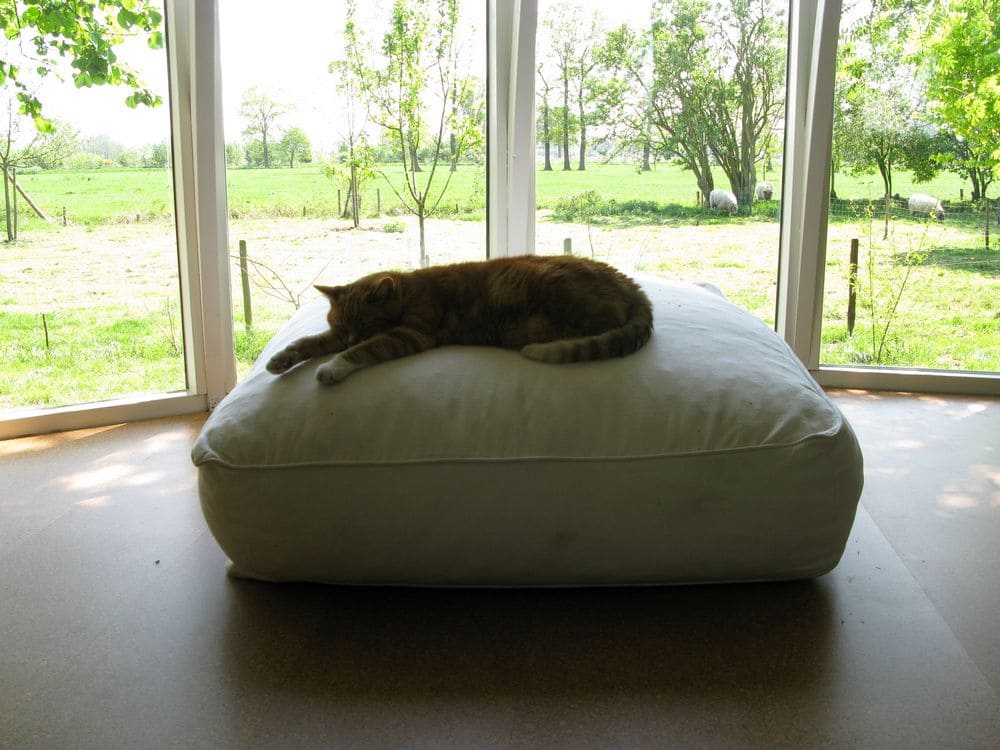
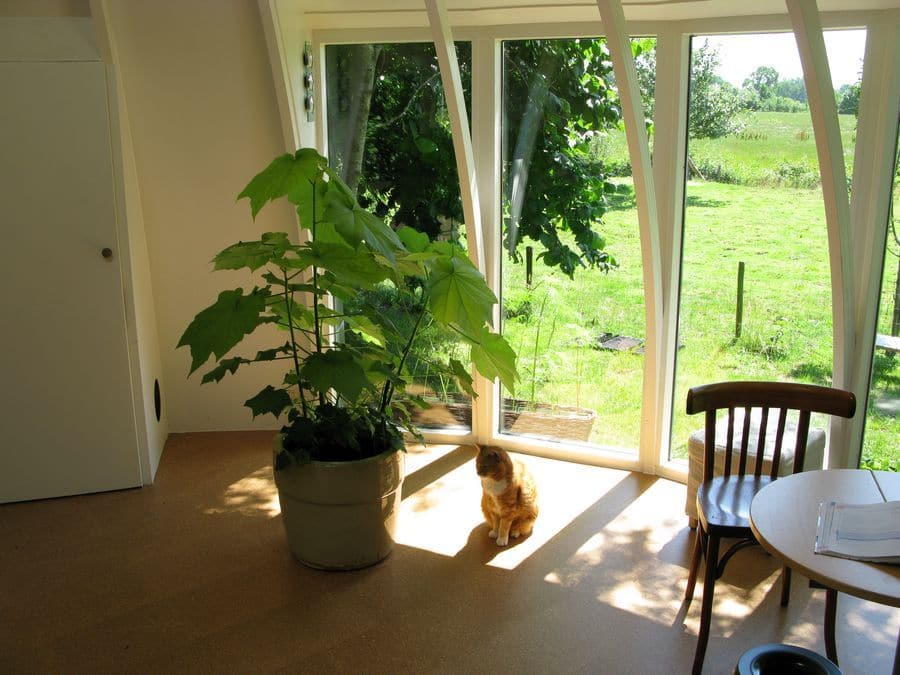
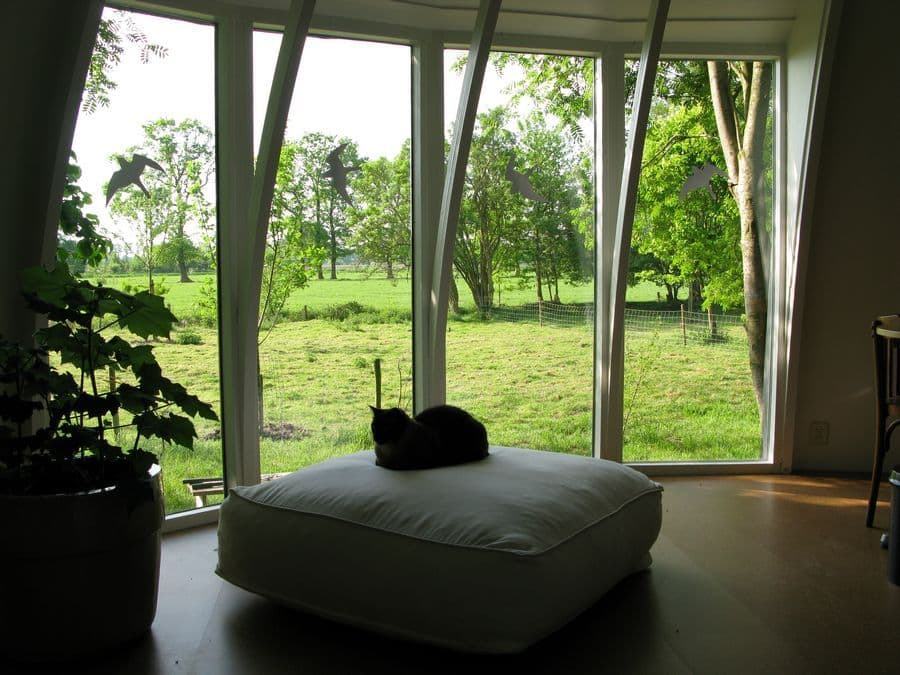
Below an impression of the interior after some painting and decorating.


Evaluation, what to do differently next time?
Even considering the dome was mainly constructed from reclaimed materials, the use of wood is still considerable. Also, building in round shapes by using straight timber and flat panels is rather labour intensive. But the round form has definitely huge advantages: thermally superior, strong, a pleasant place to be in. So, the next construction will have round shapes too, but the design will differ, see the page about the cob house.
Hi! Are there any pictures of how this dome looks once it’s covered with greenery?
Amazing space! Thank you for the detailed notes and photos. I too would like to see an updated photo of the exterior of the house – with all the vegetation growing over it. Thanks again.